Gingerbread Construction Zone: From Templates to the Build
/
Let's talk about construction of your house. You have the gingerbread chilling in the fridge, and the supplies to make the royal icing, but what is your house going to look like?
Don't fret, we have two templates here that will lead you down the path to building your own adorable gingerbread house. In case you are feeling like an elf and aiming to push the gingerbread to the next level, I'll outline the basics on how to make a template and then we'll move onto the physical construction of your house.
Making Your Own Template
The first thing I do when I want to make a new template is search around for a picture of a house that would look nice in gingerbread. I try my best to keep reality in check and find something that isn't too complicated. The original should be able to be simplified and built in gingerbread. This year I found a little farmhouse image and went with that.
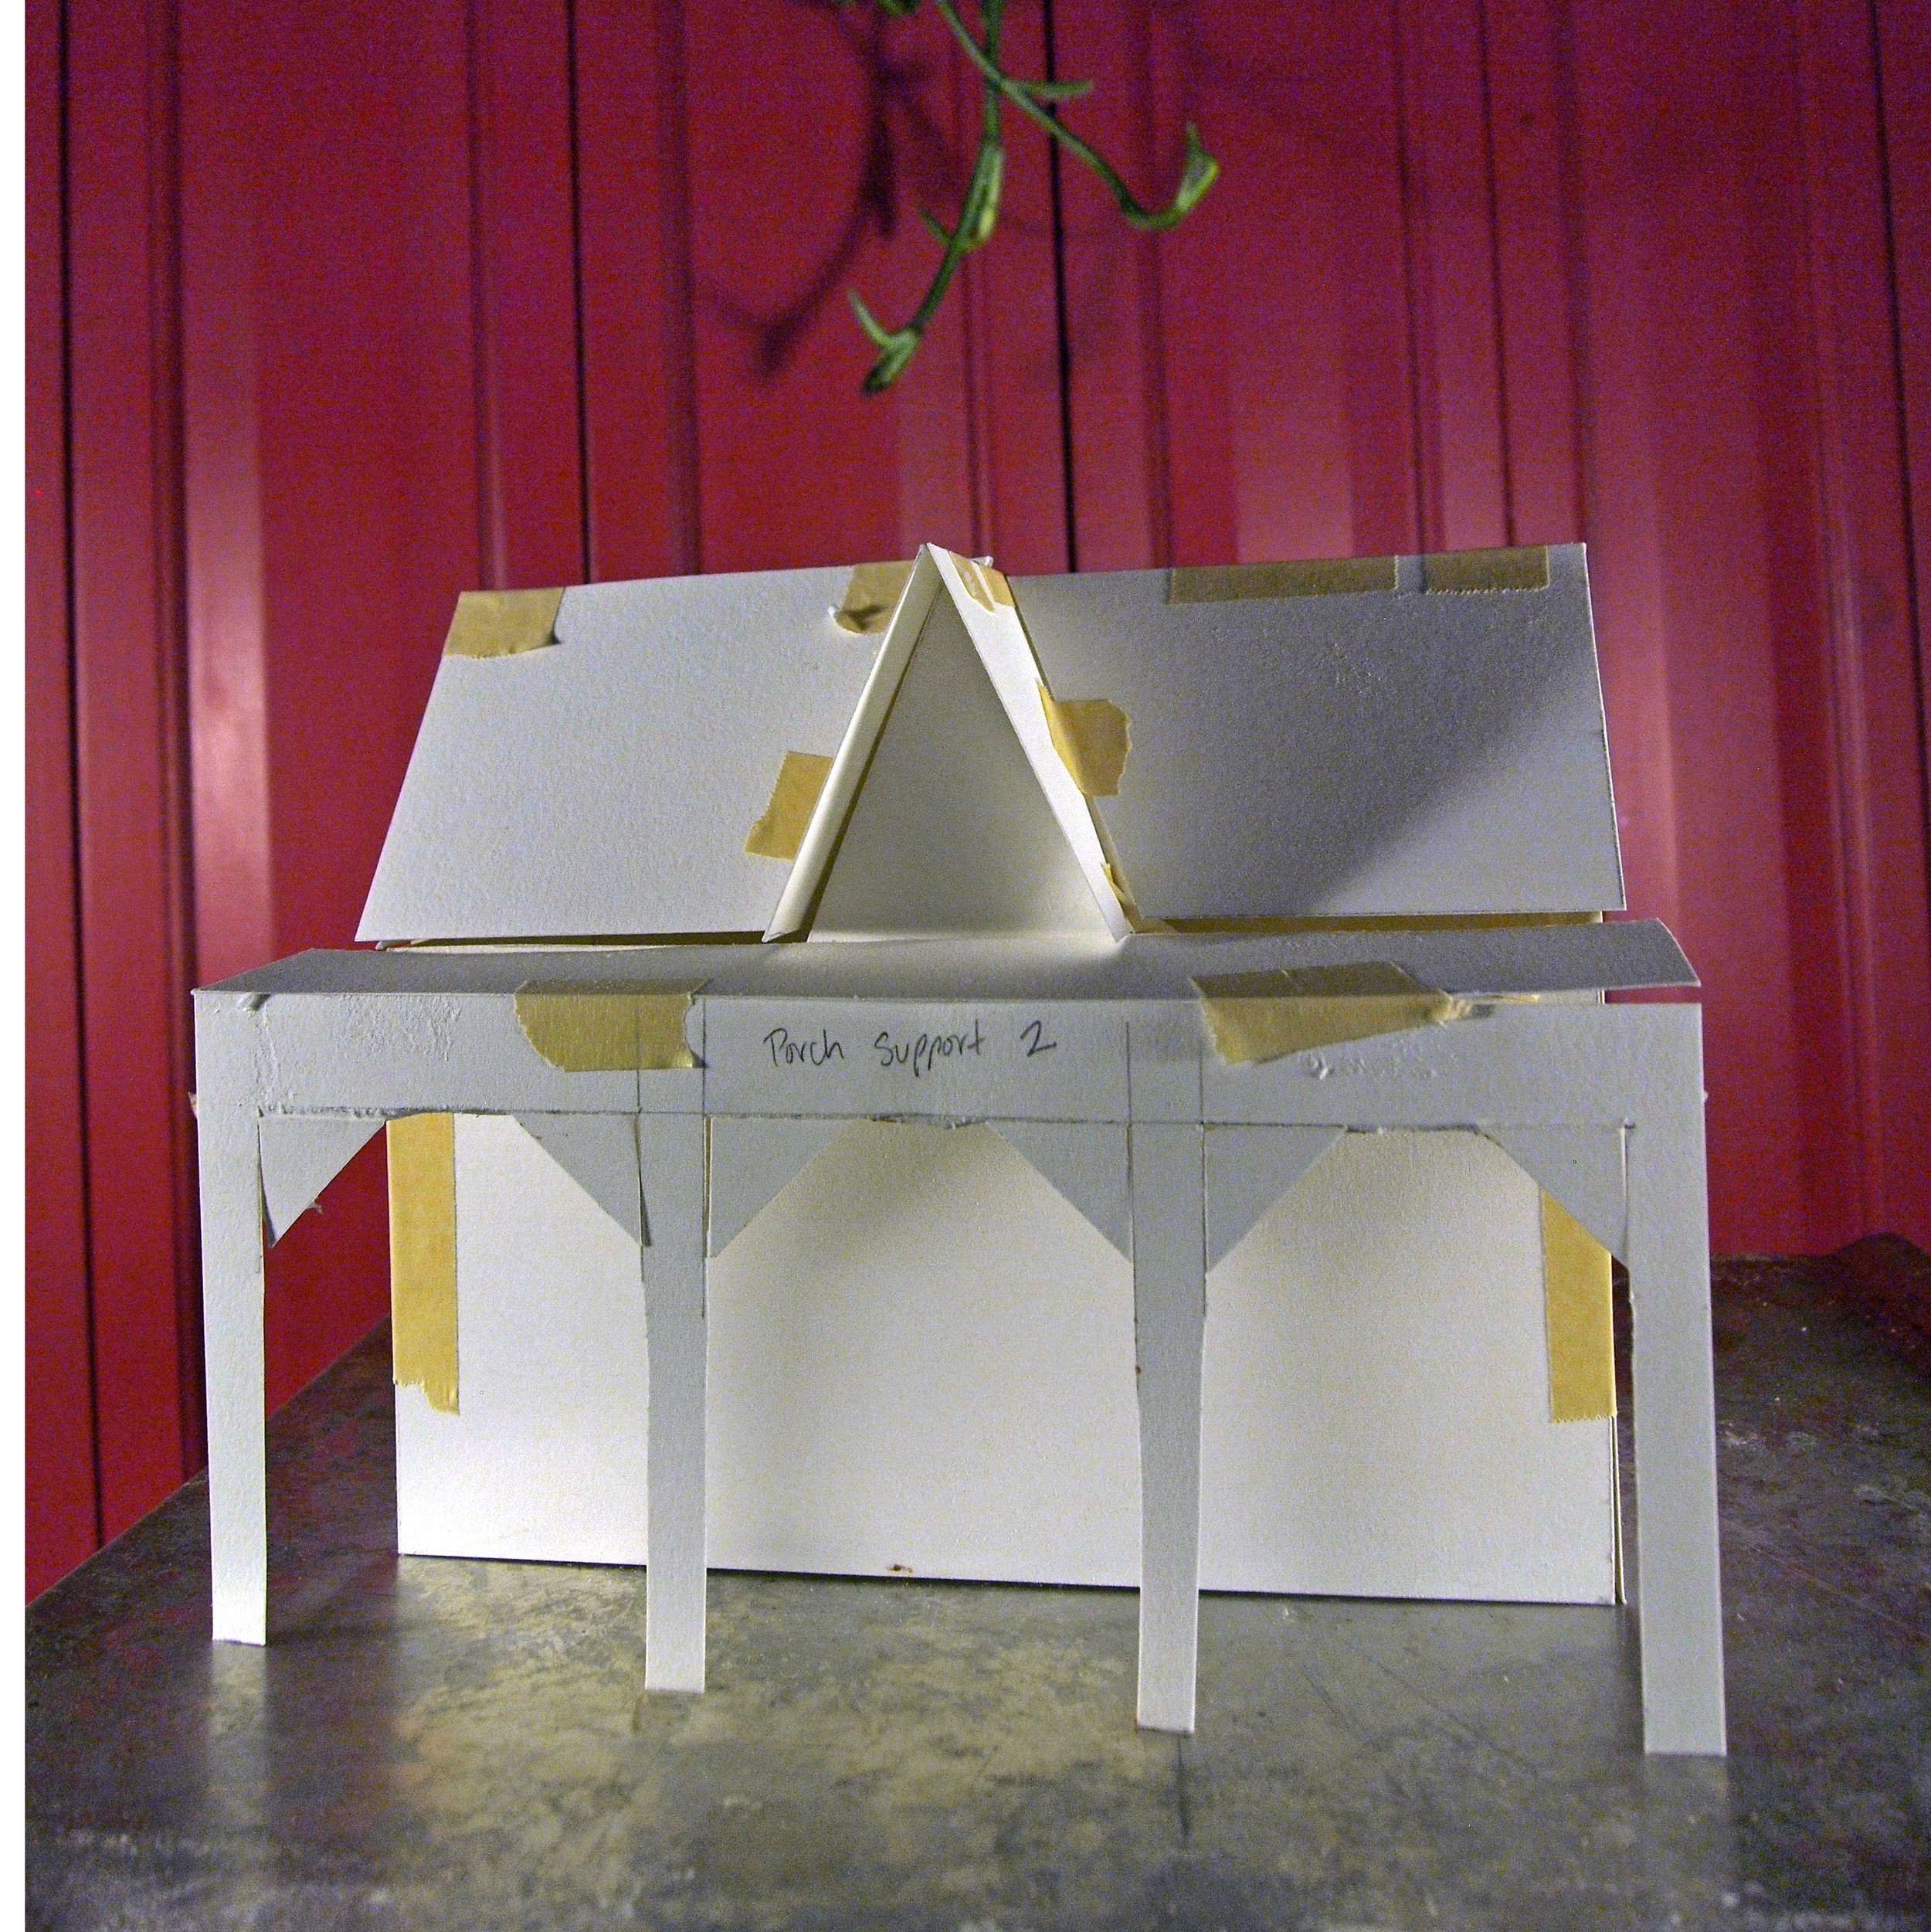
Everyone is different when it comes to translating something two dimensional into three dimensions. My method is to start in 3D rather than starting with a drawing, and use card stock, scissors, tape, pencil, and a ruler to build the house.
Focus on the base structure of the house first, ignoring details like porches, and draw the shape of the front panel. In most cases, the back will be the same shape so you should cut two. After the front and back of the house are cut, determine how deep you want the house to be. Is it a skinny, deep row house? Or a wide rancher that doesn't have much depth? Once the depth is decided, cut out two pieces of the same size to be the side walls, the same height as the front piece. Tape all four walls together so they stand up and decide on a roof shape. This can be a simple a-line or something with dormers, you just need to experiment with different elements. Sometimes you'll realize that your walls aren't going to meet up with roof you want, that's ok, this is the exploratory phase, just cut out some paper in the right shape and tape it on. When you take the model apart you can retrace that part of the template to the new specifications.
Once your roof is the right shape, add on porches and extra details. Take your model apart; if you have any notes or changes, fix the template and now we're ready to roll out the gingerbread.
Printable Templates

A-Frame Ski Shack Template
Farmhouse Template
Cutting Out the Gingerbread
If you're using one of our templates or one of your own you can jump in here.
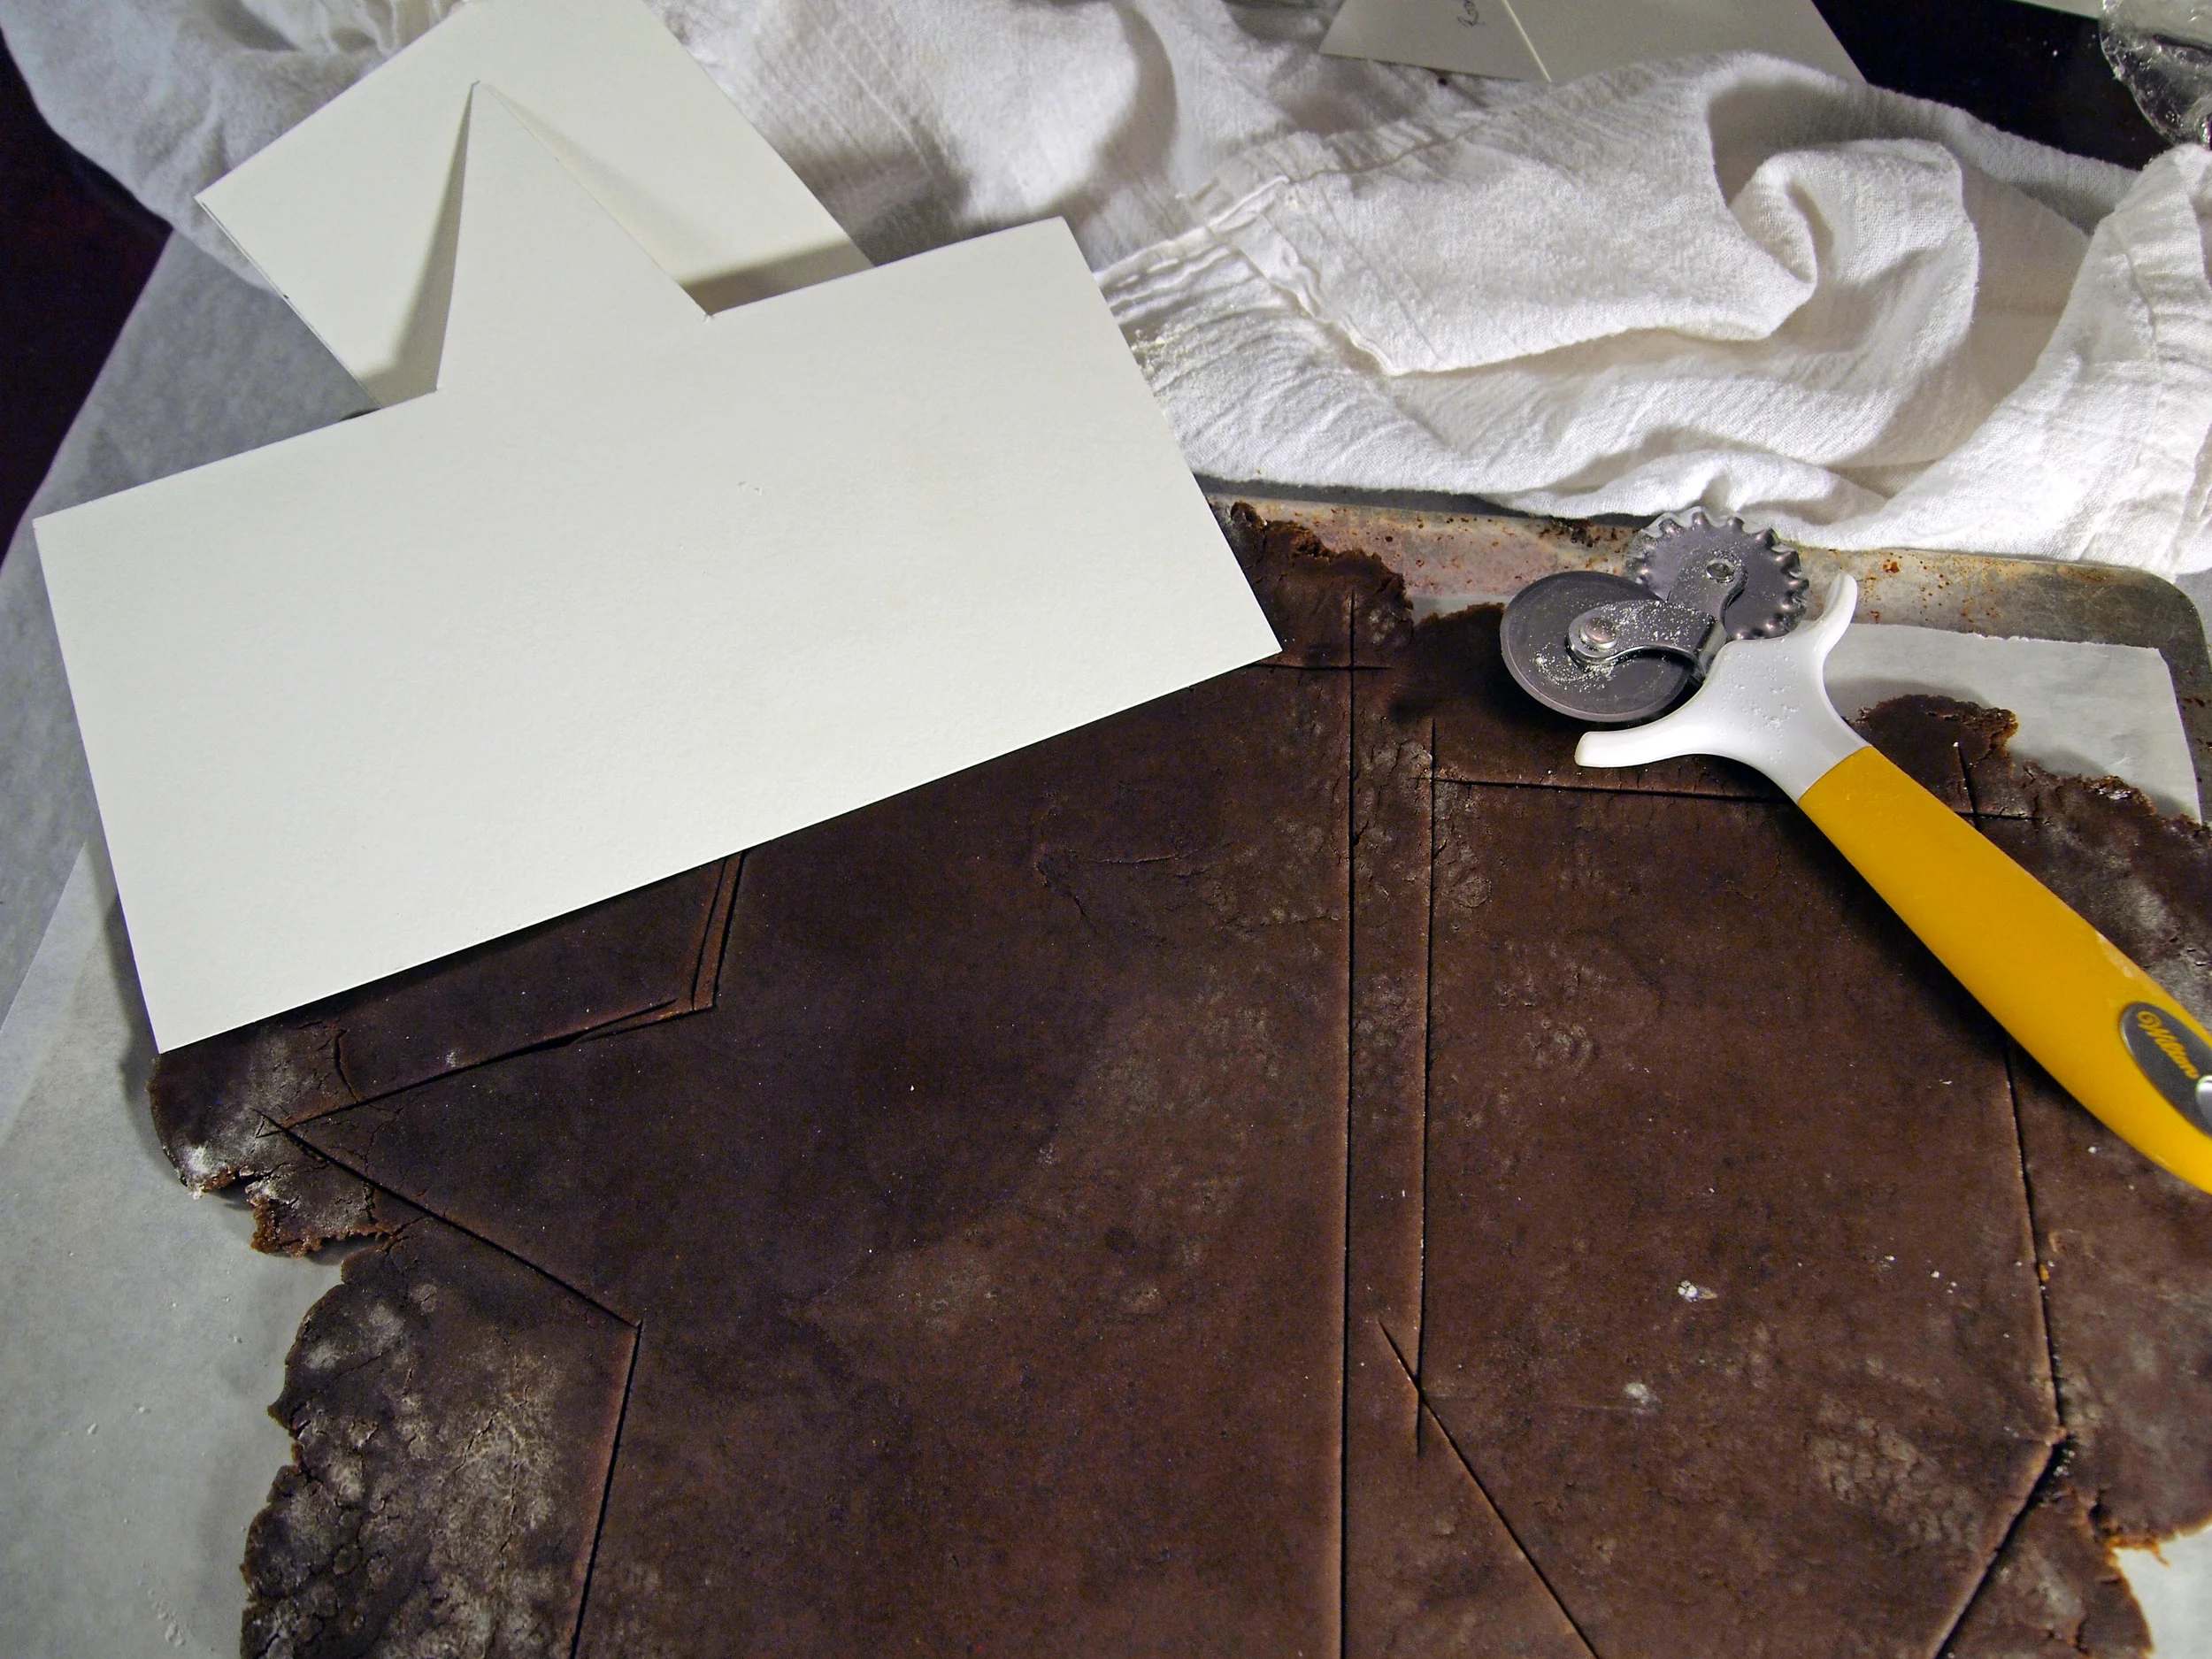
Cut out the template of your choosing, out of card stock. Our template, much like a sewing pattern tells you how many of each shape to cut out of gingerbread. For instance, there is only one front wall on the template, use that shape to cut two out of gingerbread since you want a front and back of your house.

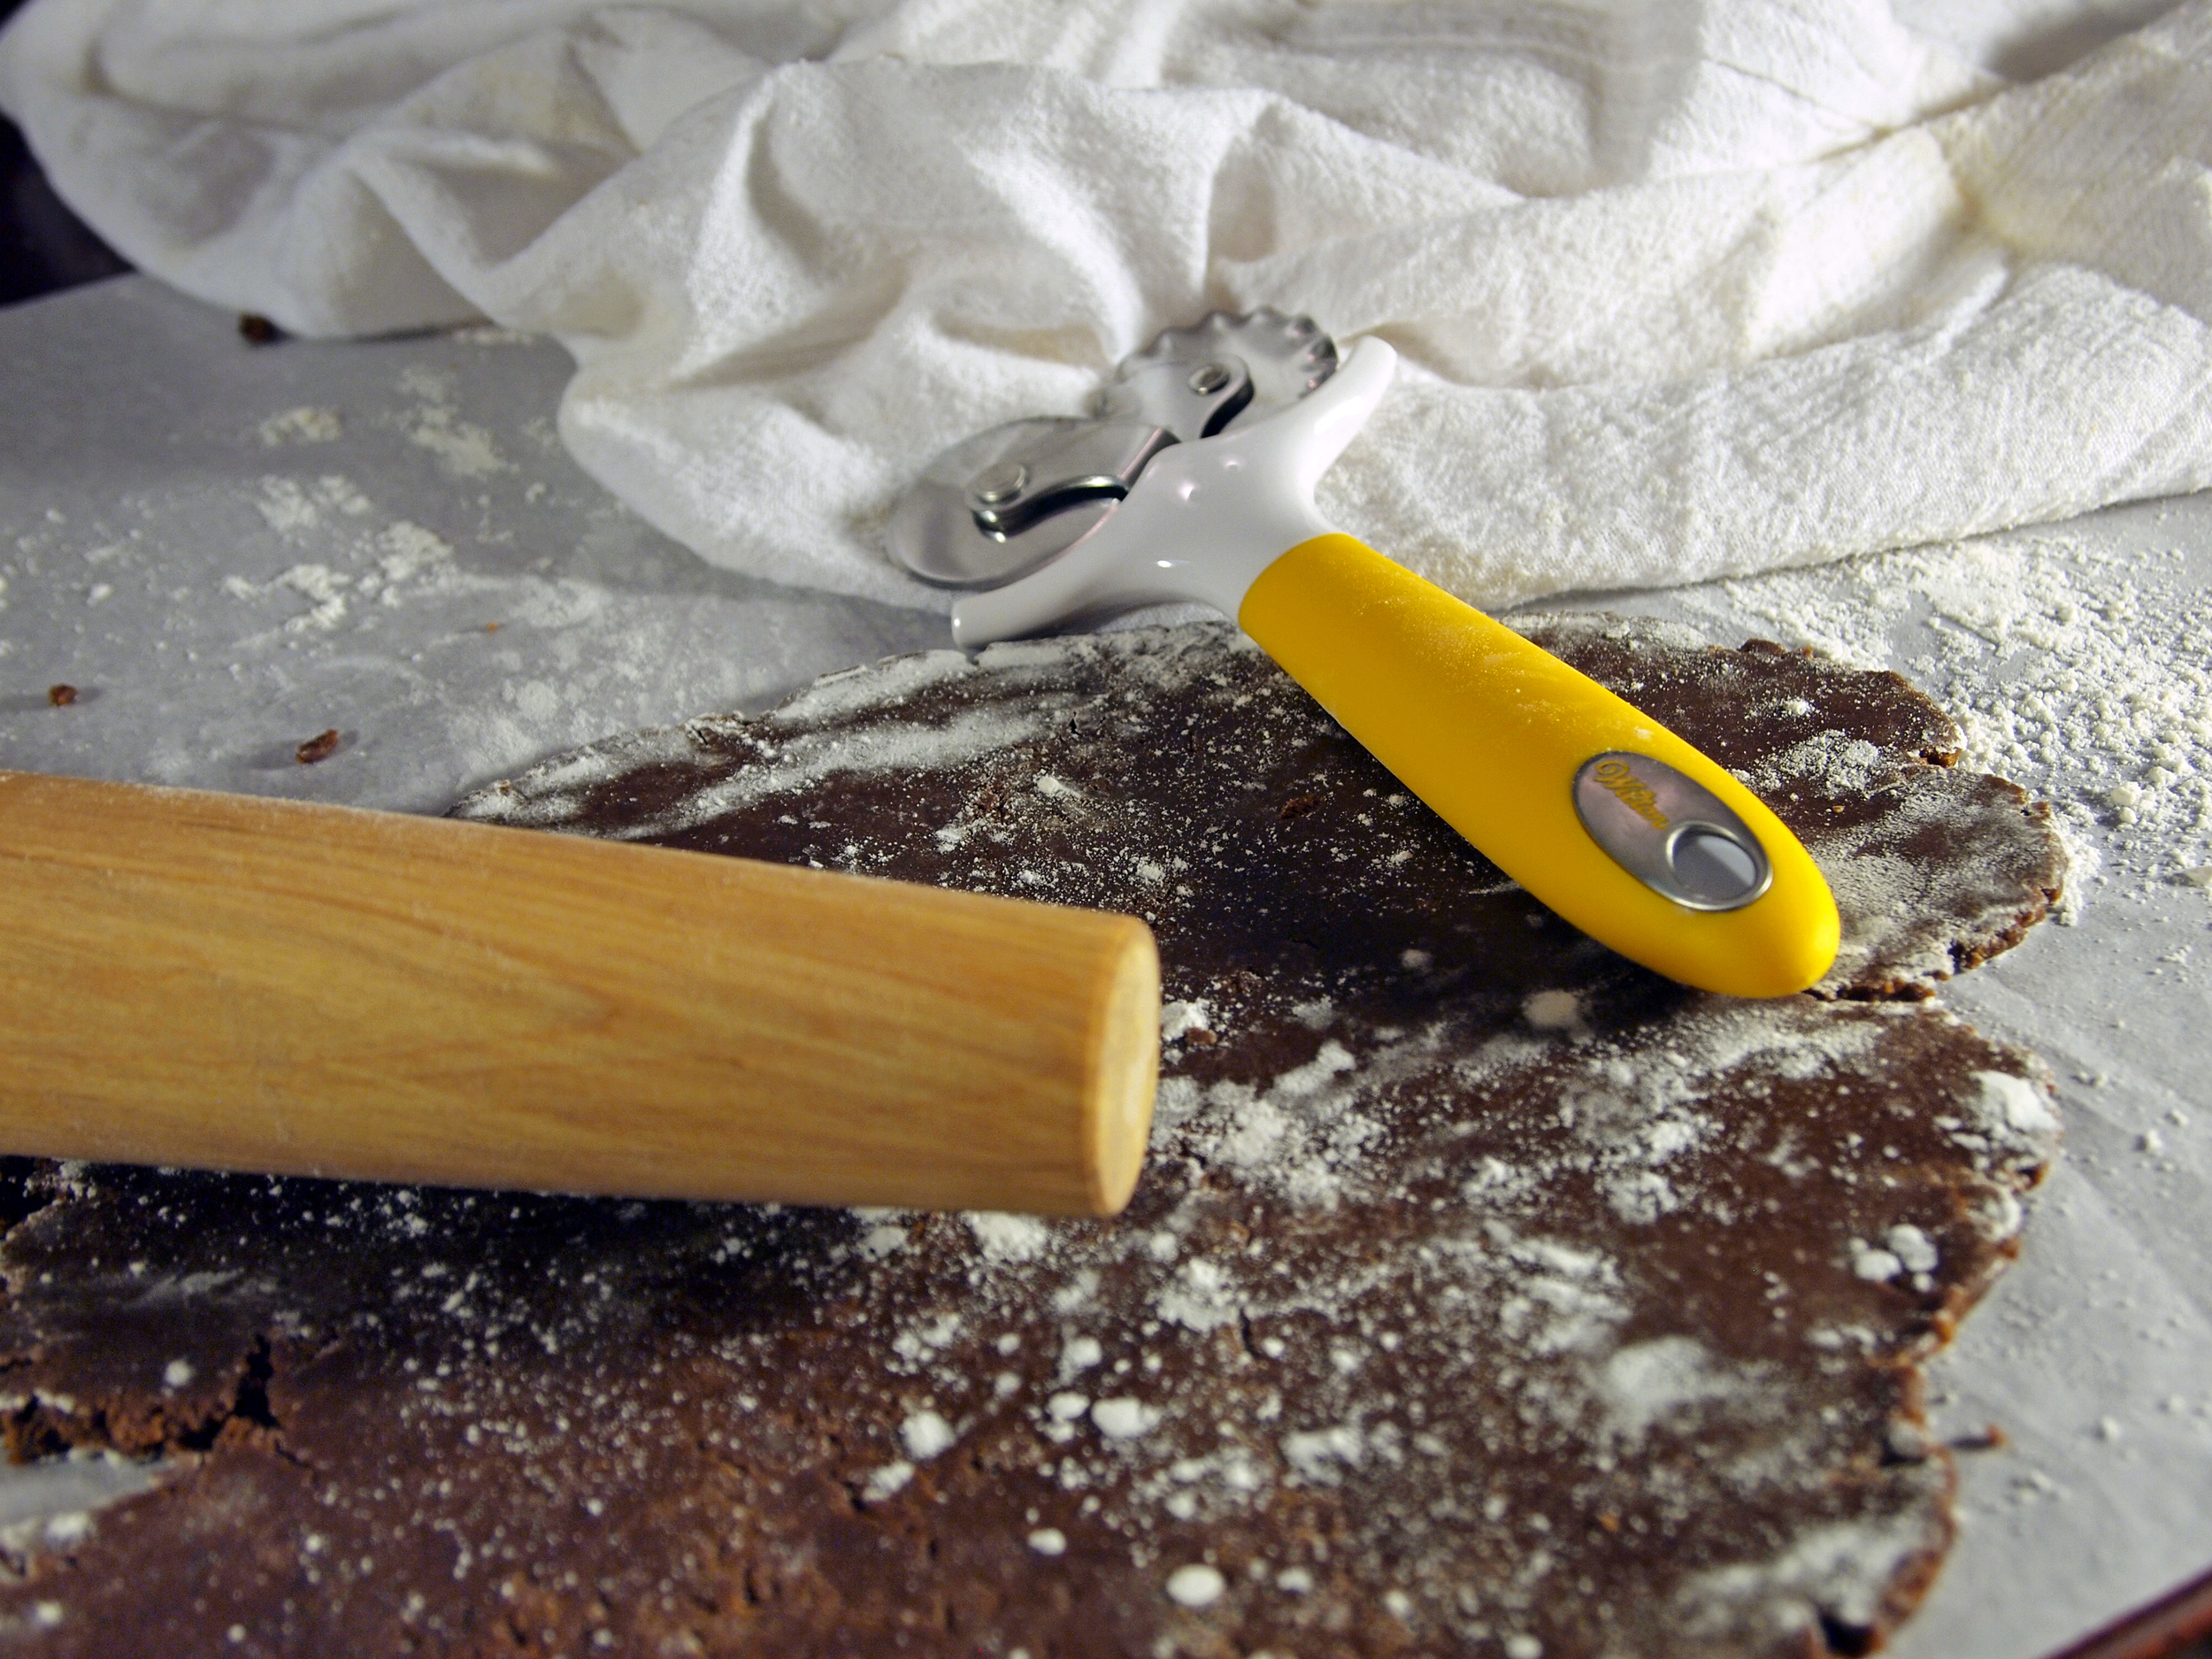
Roll out half of your gingerbread, detailed instructions and recipes are included on this post. Your gingerbread should be between 1/8"-1/4," lay template pieces on the gingerbread so you can fit as many template pieces as possible. The more you cut out at one time, the fewer batches you'll need to bake. We use a rotating pastry wheel to cut out the pieces, specifically this one. --->
It's made by Wilton and makes clean cuts, which is nice because when I use a knife the gingerbread edges are ragged. It's also a lot faster, and requires less coordination when you're trying to hold the template in one place.
I do the final roll out on parchment paper on the cookie sheet so I don't have to move the final pieces. Less movement means less of a chance for the shapes to shift.
Chill the shapes for 5-10 minutes and then bake in a 350º oven for 8-15 minutes, depending on the size. It's better to over bake than under bake for this project. We don't want any collapsing gingerbread houses!
Construction
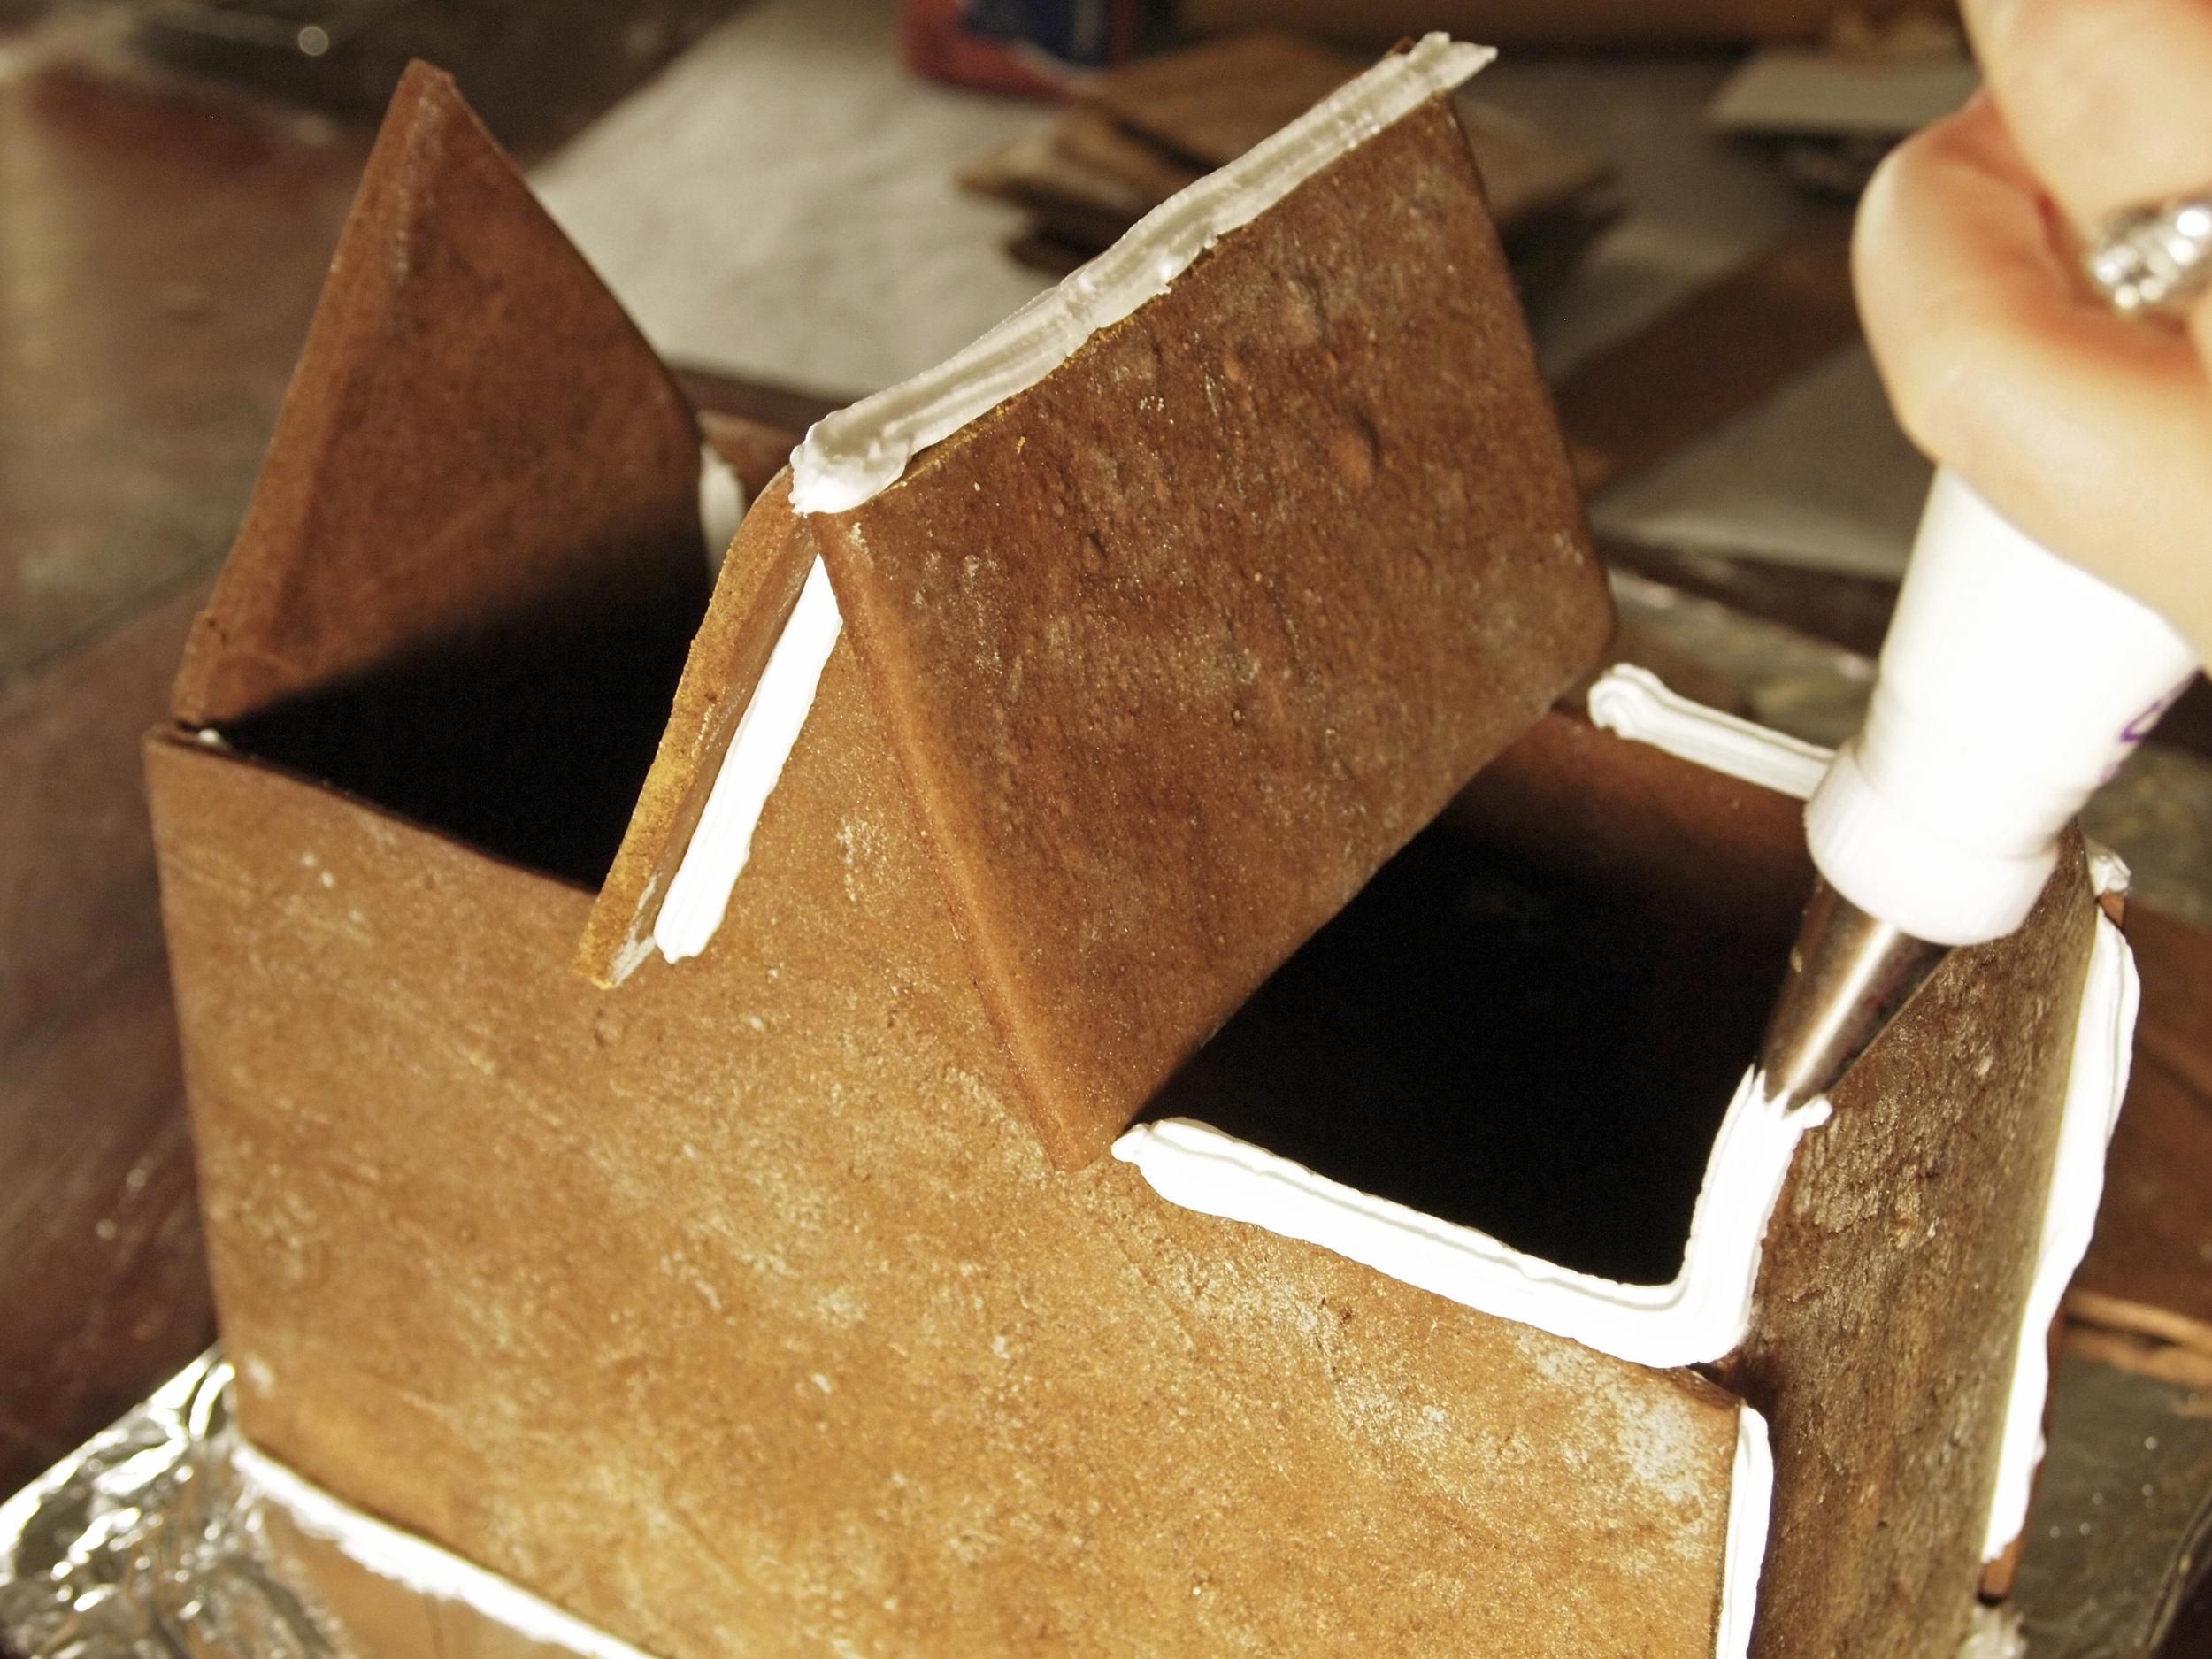
Find your base, this can be a cookie sheet, or a piece of cardboard or wood. I always cover the base in foil to aid in clean up after the holiday season, plus I think the silver looks nice.
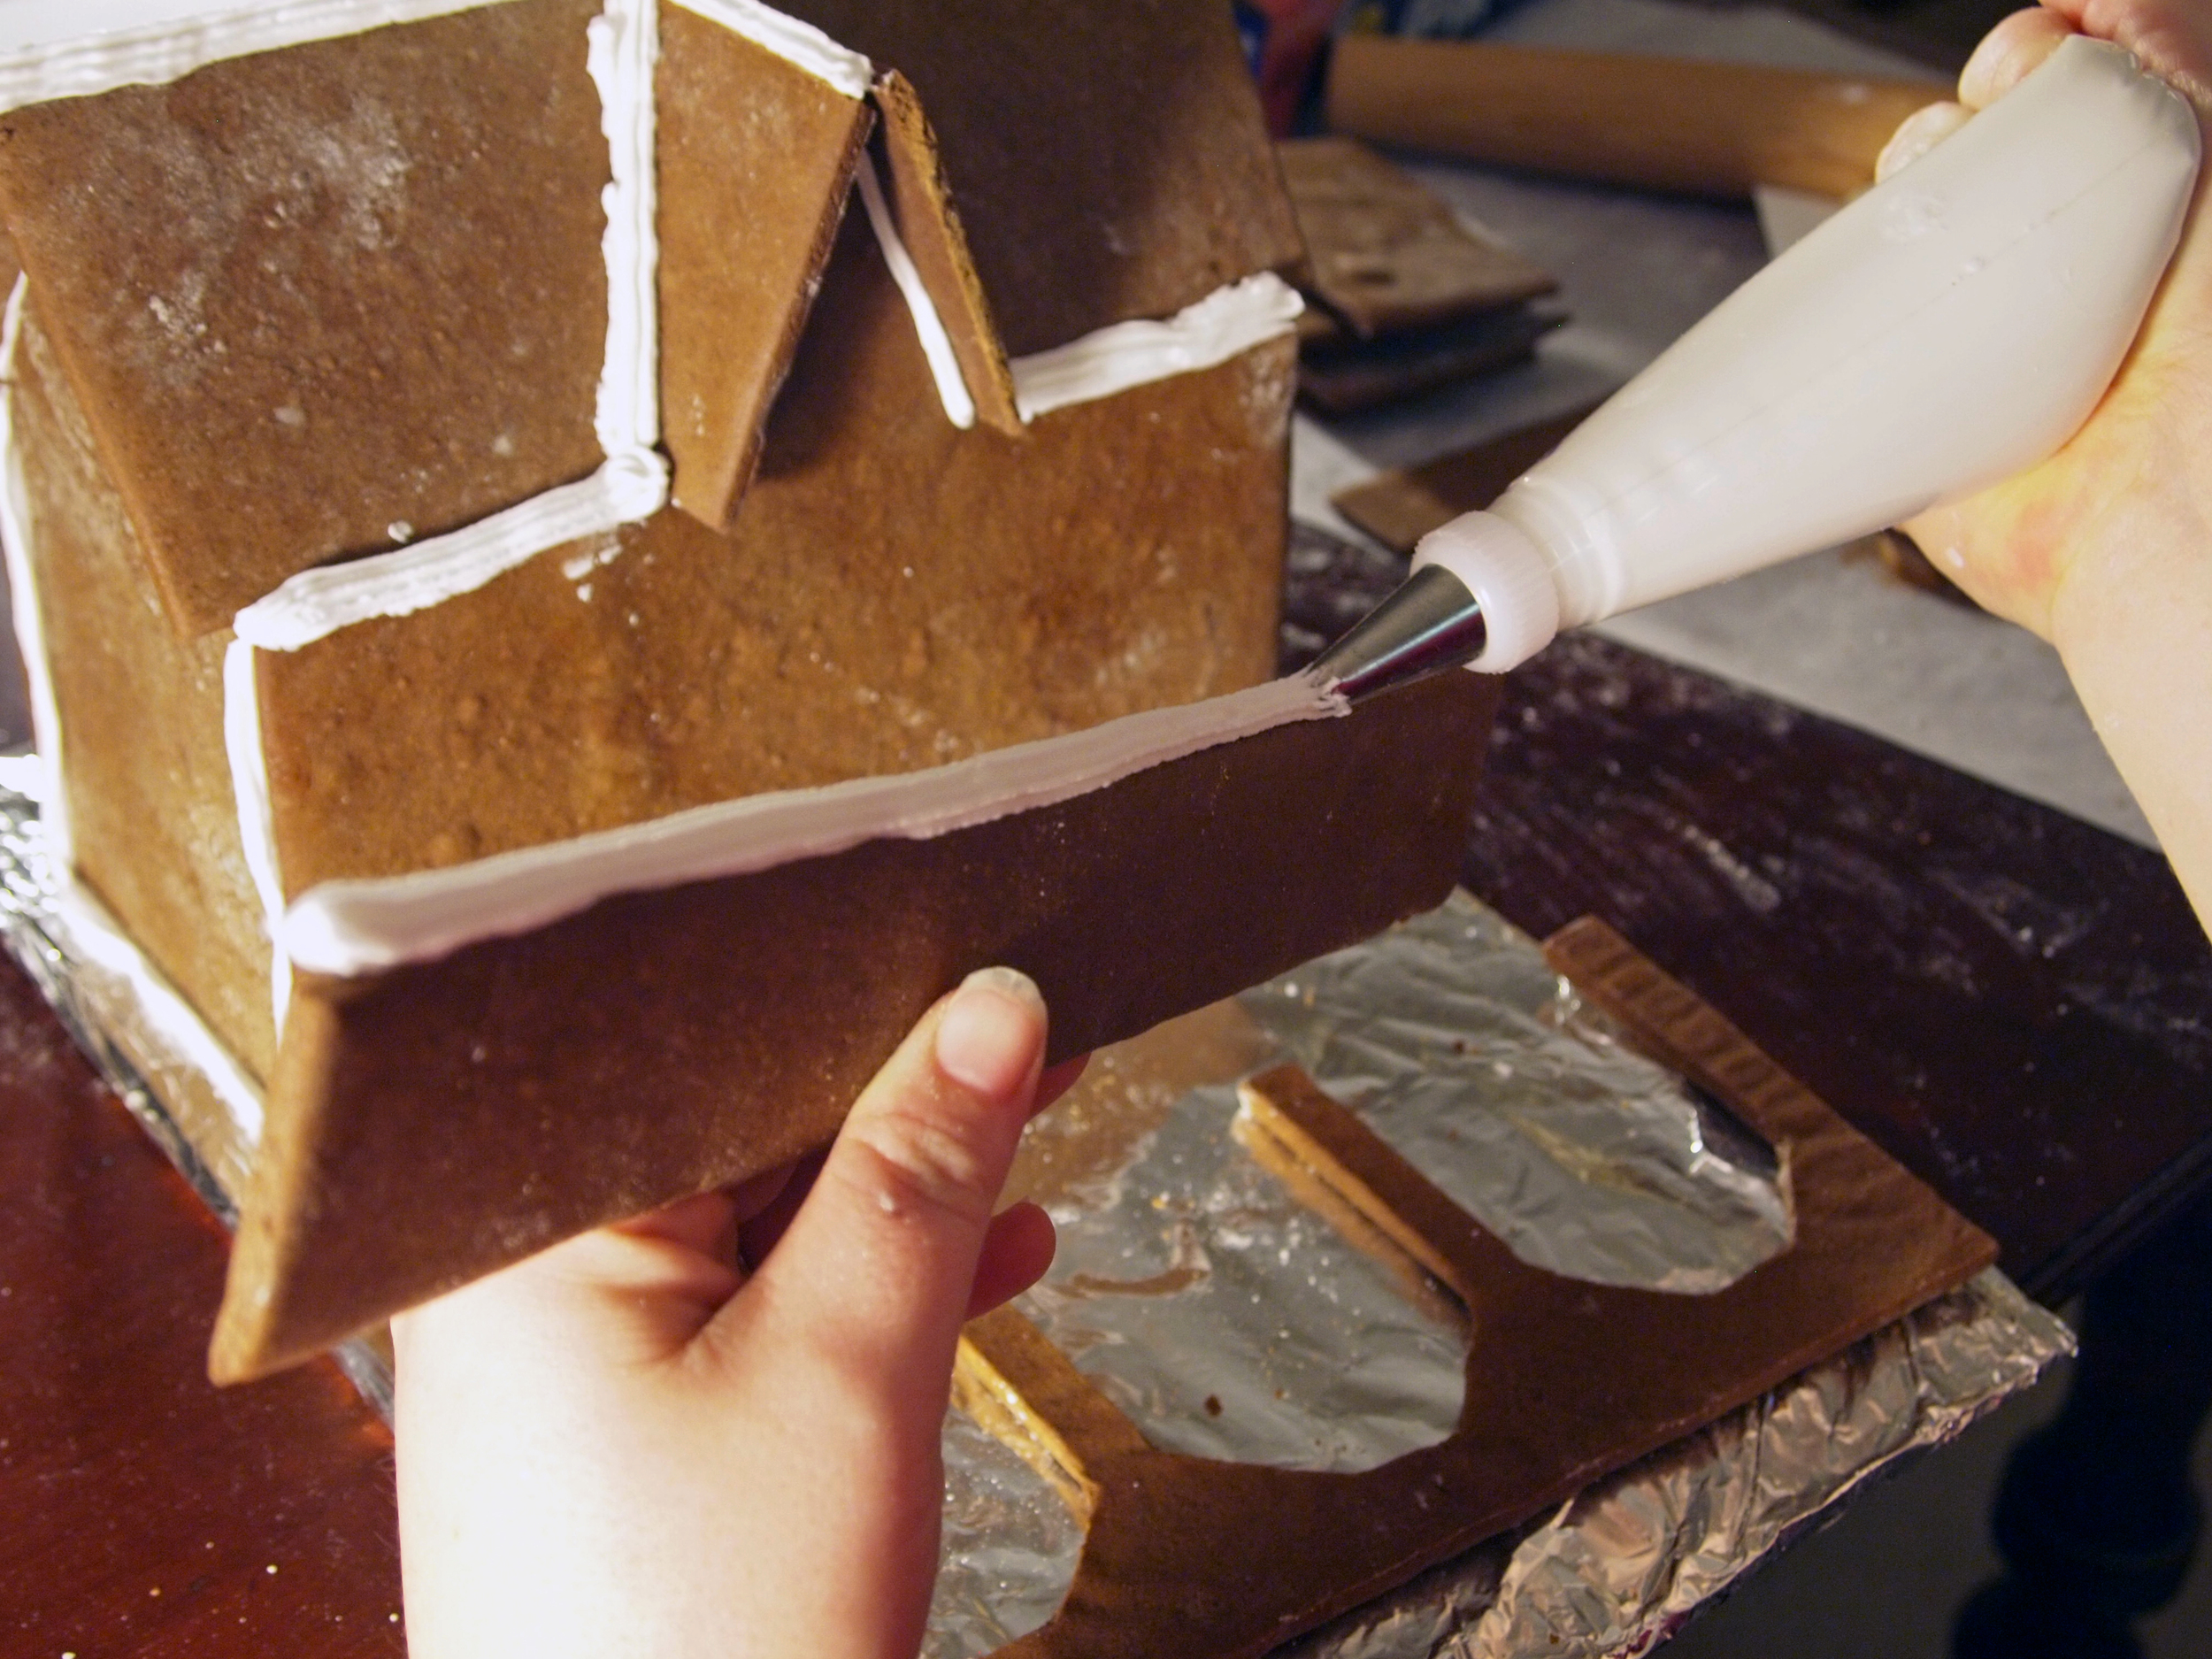
Make your royal icing. Remember that this is for construction, it should be thick and hold its shape. Not many things are more frustrating than trying to put together a house with royal icing that won't hold your the pieces together. Put your royal icing in an icing bag fit with a large tip. Start with the walls, running a line of icing along the base and side of the wall. When building your house, it is most typical for them to be constructed with a mitered edge (overlapped), so icing will be on the back side of wall "A" and meets wall "B" on its edge.
Finish putting up all four walls, using the method described above. Let your house set for at least 30 minutes, so that your walls are solid before adding the roof. When you do add the roof, be patient and go slowly. Add icing to the top edge of the walls where they meet the backs of the roof pieces. Hold in place for a few seconds to attach. After the roof is installed, extras can be added like porches and dormers.


Congratulations! Most of the work on your house is done, it just needs a little time to set before you start decorating. If you're feeling ready, start decorating about 30 minutes after you are done construction. If you feel like you need a bit more help, Thursday we will go over some tips and ways to use candy as decoration on your house.
In the meantime, I hope your holiday preparations are going well and you are feeling full of the holiday spirit! We'll see you on Thursday.