Four Secrets to Decorating Cookies that Will Surely Impress Your Guests
/
One of my favorite Christmas traditions is to make and decorate sugar cookies. I started this tradition as an adult, so to all you Christmas haters, there is no reason to prolong your dislike of the holiday because of childhood memories. You can make the holidays into whatever you want, and create your own fun traditions, start with these cookies!
Okay back to cookies, I was never really into the taste of sugar cookies, there was always something a little metallic-y about them, or they left a weird film in your mouth, or they tasted like old lady perfume (somehow?). Despite my distaste for sugar cookies, a few years ago, I started buying cookie cutters. I wanted to try my hand at decorating cookies and the cute shapes inspired me to look past the weird cookie taste and just go for it.
My first cookie cutter was a lobster, I mean who could turn down a lobster cookie? I searched around for a recipe to use. I don't remember thinking that much about the recipes or analyzing them, but by some chance I stumbled across joyofbaking.com and her sugar cookie recipe. It was love at first taste! I preach about this recipe whenever I get the chance, and this is a great chance. The cookies come out perfect every time; buttery, just sweet enough, and they hold their shape well when you use intricate cookie cutters. If you are searching for a great basic sugar cookie--look no further, you found it!
On the website she also has a basic royal icing recipe that works perfectly. I shared the Joy of Baking's version as well as an adapted version for royal icing using eggs in my gingerbread recipe post. Here I'll share her recipe using meringue powder.
Note: I'll be honest, I've made and eaten cookies with royal icing that used raw eggs. I lived to tell the tale, but whenever I do it, I always feel like I'm pushing my luck. Most often I use meringue powder and I would advise you to do the same.
Sugar Cookies
Ingredients
3 cups (390 grams) all purpose flour
1/2 teaspoon salt
1 teaspoon baking soda
1 cup (227 grams) unsalted butter, room temperature
1 cup (200 grams) granulated white sugar
2 large eggs
2 teaspoons pure vanilla extract
Directions
In a separate bowl whisk together the flour, salt, and baking soda. In the bowl of your electric mixer beat the butter and sugar until light and fluffy (about 3 minutes). Add the eggs and vanilla extract and beat until combined. Add the flour mixture and beat until you have a smooth dough. Divide the dough in half and wrap each half in plastic wrap. Refrigerate for about one hour or until firm enough to roll.
Preheat oven to 350 degrees F (177 degrees C) and place rack in center of oven. Line two baking sheets with parchment paper.
Remove one half of the chilled dough from the refrigerator and, on a lightly floured surface, roll out the dough to a thickness of 1/4 inch (1 cm). (Keep turning the dough as you roll, making sure the dough does not stick to the counter.) Cut out desired shapes using a lightly floured cookie cutter and transfer cookies to baking sheet. Place the baking sheets with the unbaked cookies in the refrigerator for about 15 minutes to chill the dough which prevents the cookies from spreading and losing their shape while baking. Note: If you are not going to frost the baked cookies, you can sprinkle the unbaked cookies with sparkling sugar.
Bake cookies for about 8-10 minutes (depending on size) or until the edges are just starting to brown. Remove from oven and let cookies cool on baking sheet for a few minutes before transferring to a wire rack to finish cooling. Frost with royal icing, if desired. Be sure to let the royal icing dry completely before storing. (This may take several hours or overnight.)
Royal Icing with Meringue Powder
Ingredients
4 cups (440 grams) confectioners' sugar
3 tablespoons (30 grams) meringue powder
1/2 teaspoon almond extract(optional)
1/2 cup - 3/4 cup (120 - 180 ml) warm water
Gel Paste Food Coloring
Directions
In the bowl of your electric mixer (or with a hand mixer), beat the sugar and meringue powder until combined. Add the water and beat on medium/high speed until glossy and stiff peaks form (about 5 minutes). If necessary, to get the right consistency, add more powdered sugar or water. Add food coloring, if desired. To cover the entire surface of the cookie with icing, the proper consistency is when you lift the beater, the ribbon of icing that falls back into the bowl remains on the surface of the icing for a few seconds before disappearing. The icing needs to be used immediately or transferred to an airtight container as it hardens when exposed to air.

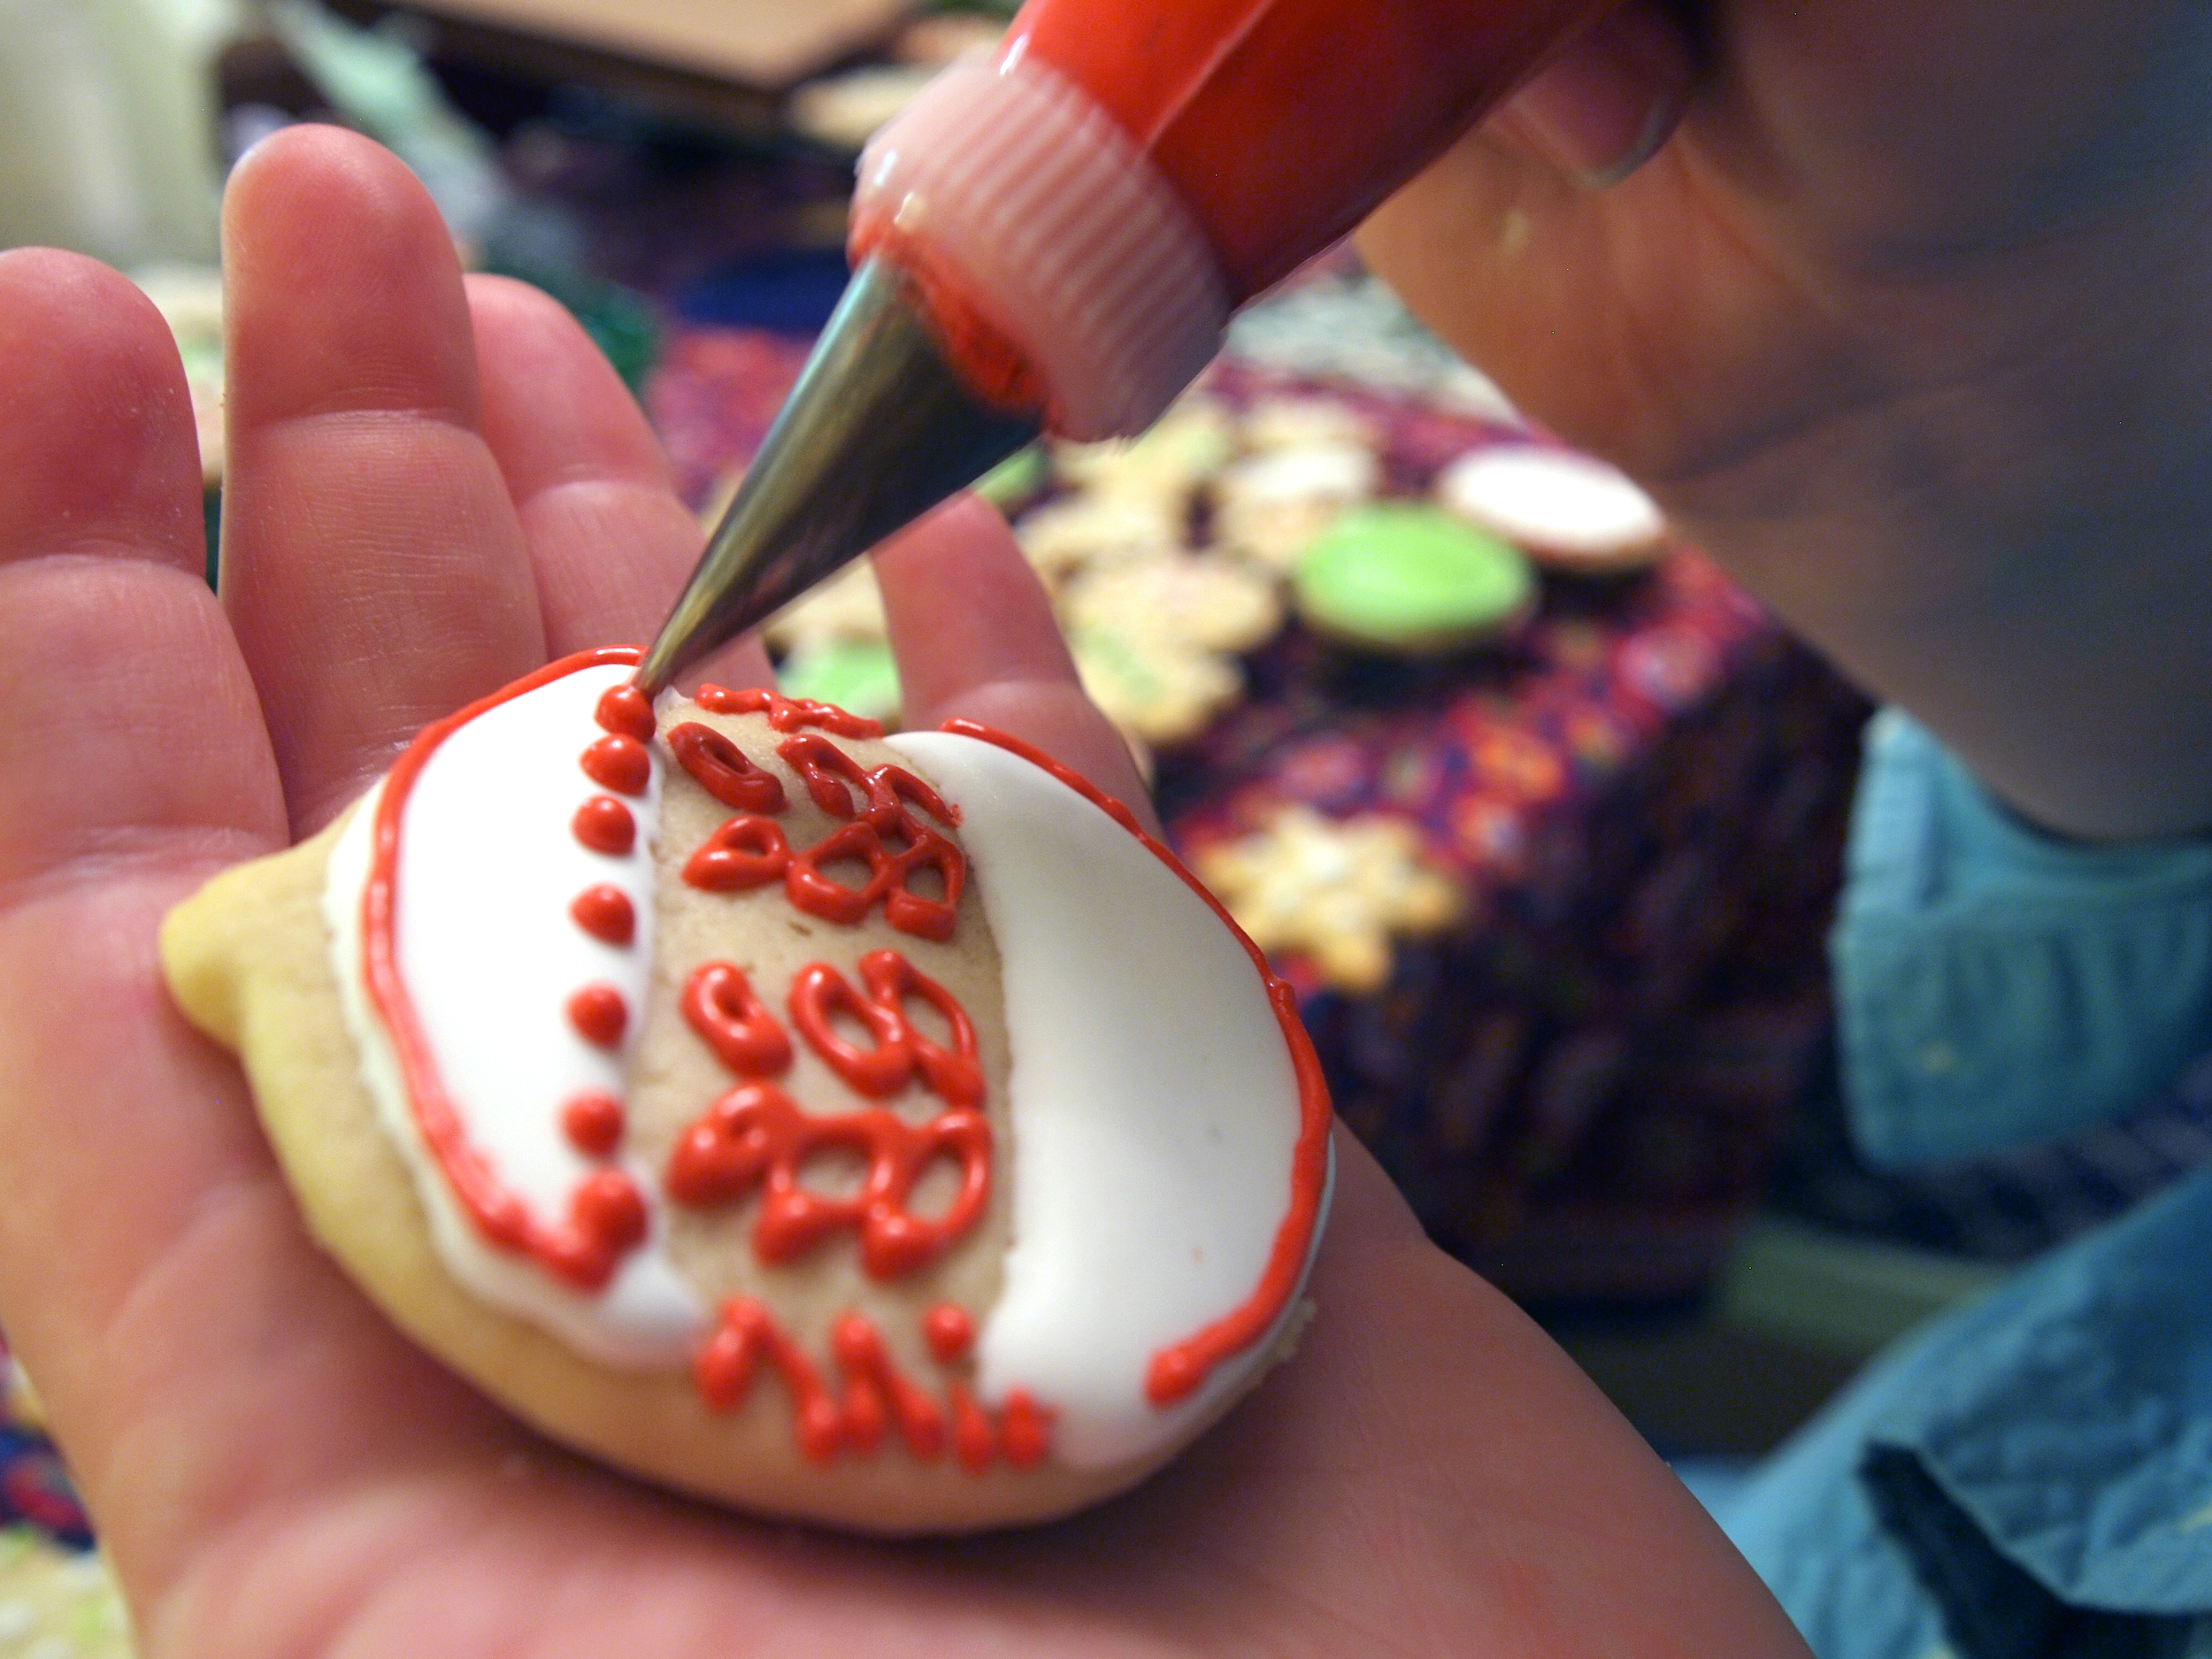
Decorating
To decorate your cookies, first gather your supplies. I use disposable icing bags, plastic couplers, round icing tips, sizes #1 and #2, and Americolor gel pastes. The royal icing doesn't hold it's shape very well (unless you're talking about the icing that we used in gingerbread construction) so using shaped tips won't usually lead to a controllable shape, you probably will just end up with a thick line. That is ok if you want that, if all my small round tips are being used, I'll substitute with something else. Just test the line out and make sure you'll be happy with it.
Secrets:
#1
I'm going to tell you the number one secret to piping cookies with detail. Are you ready? Find the smallest round tip you can. That's it. It's hard to make a bad looking cookie when you use a small tip. The small size gives you the most control when decorating.
#2
The second secret is to do your first layer of decoration, let it dry and then pick the same cookie up again and add another layer of detail. It will almost always look better and you will leave your cookie consuming friends in awe of your skill. Don't be afraid to pipe on top of something you already piped. Do you have a big do? Pipe a tiny dot on top, or add an asterisk on top in a contrasting color.
#3
Start in the center and work out from there. It is easy to make a symmetrical pattern if you base it off of a middle point and add elements in the round.
#4
Complicated designs are all built on small parts, don't be intimidated by the big picture, just keep adding little elements and before long you'll have a beautiful cookie.
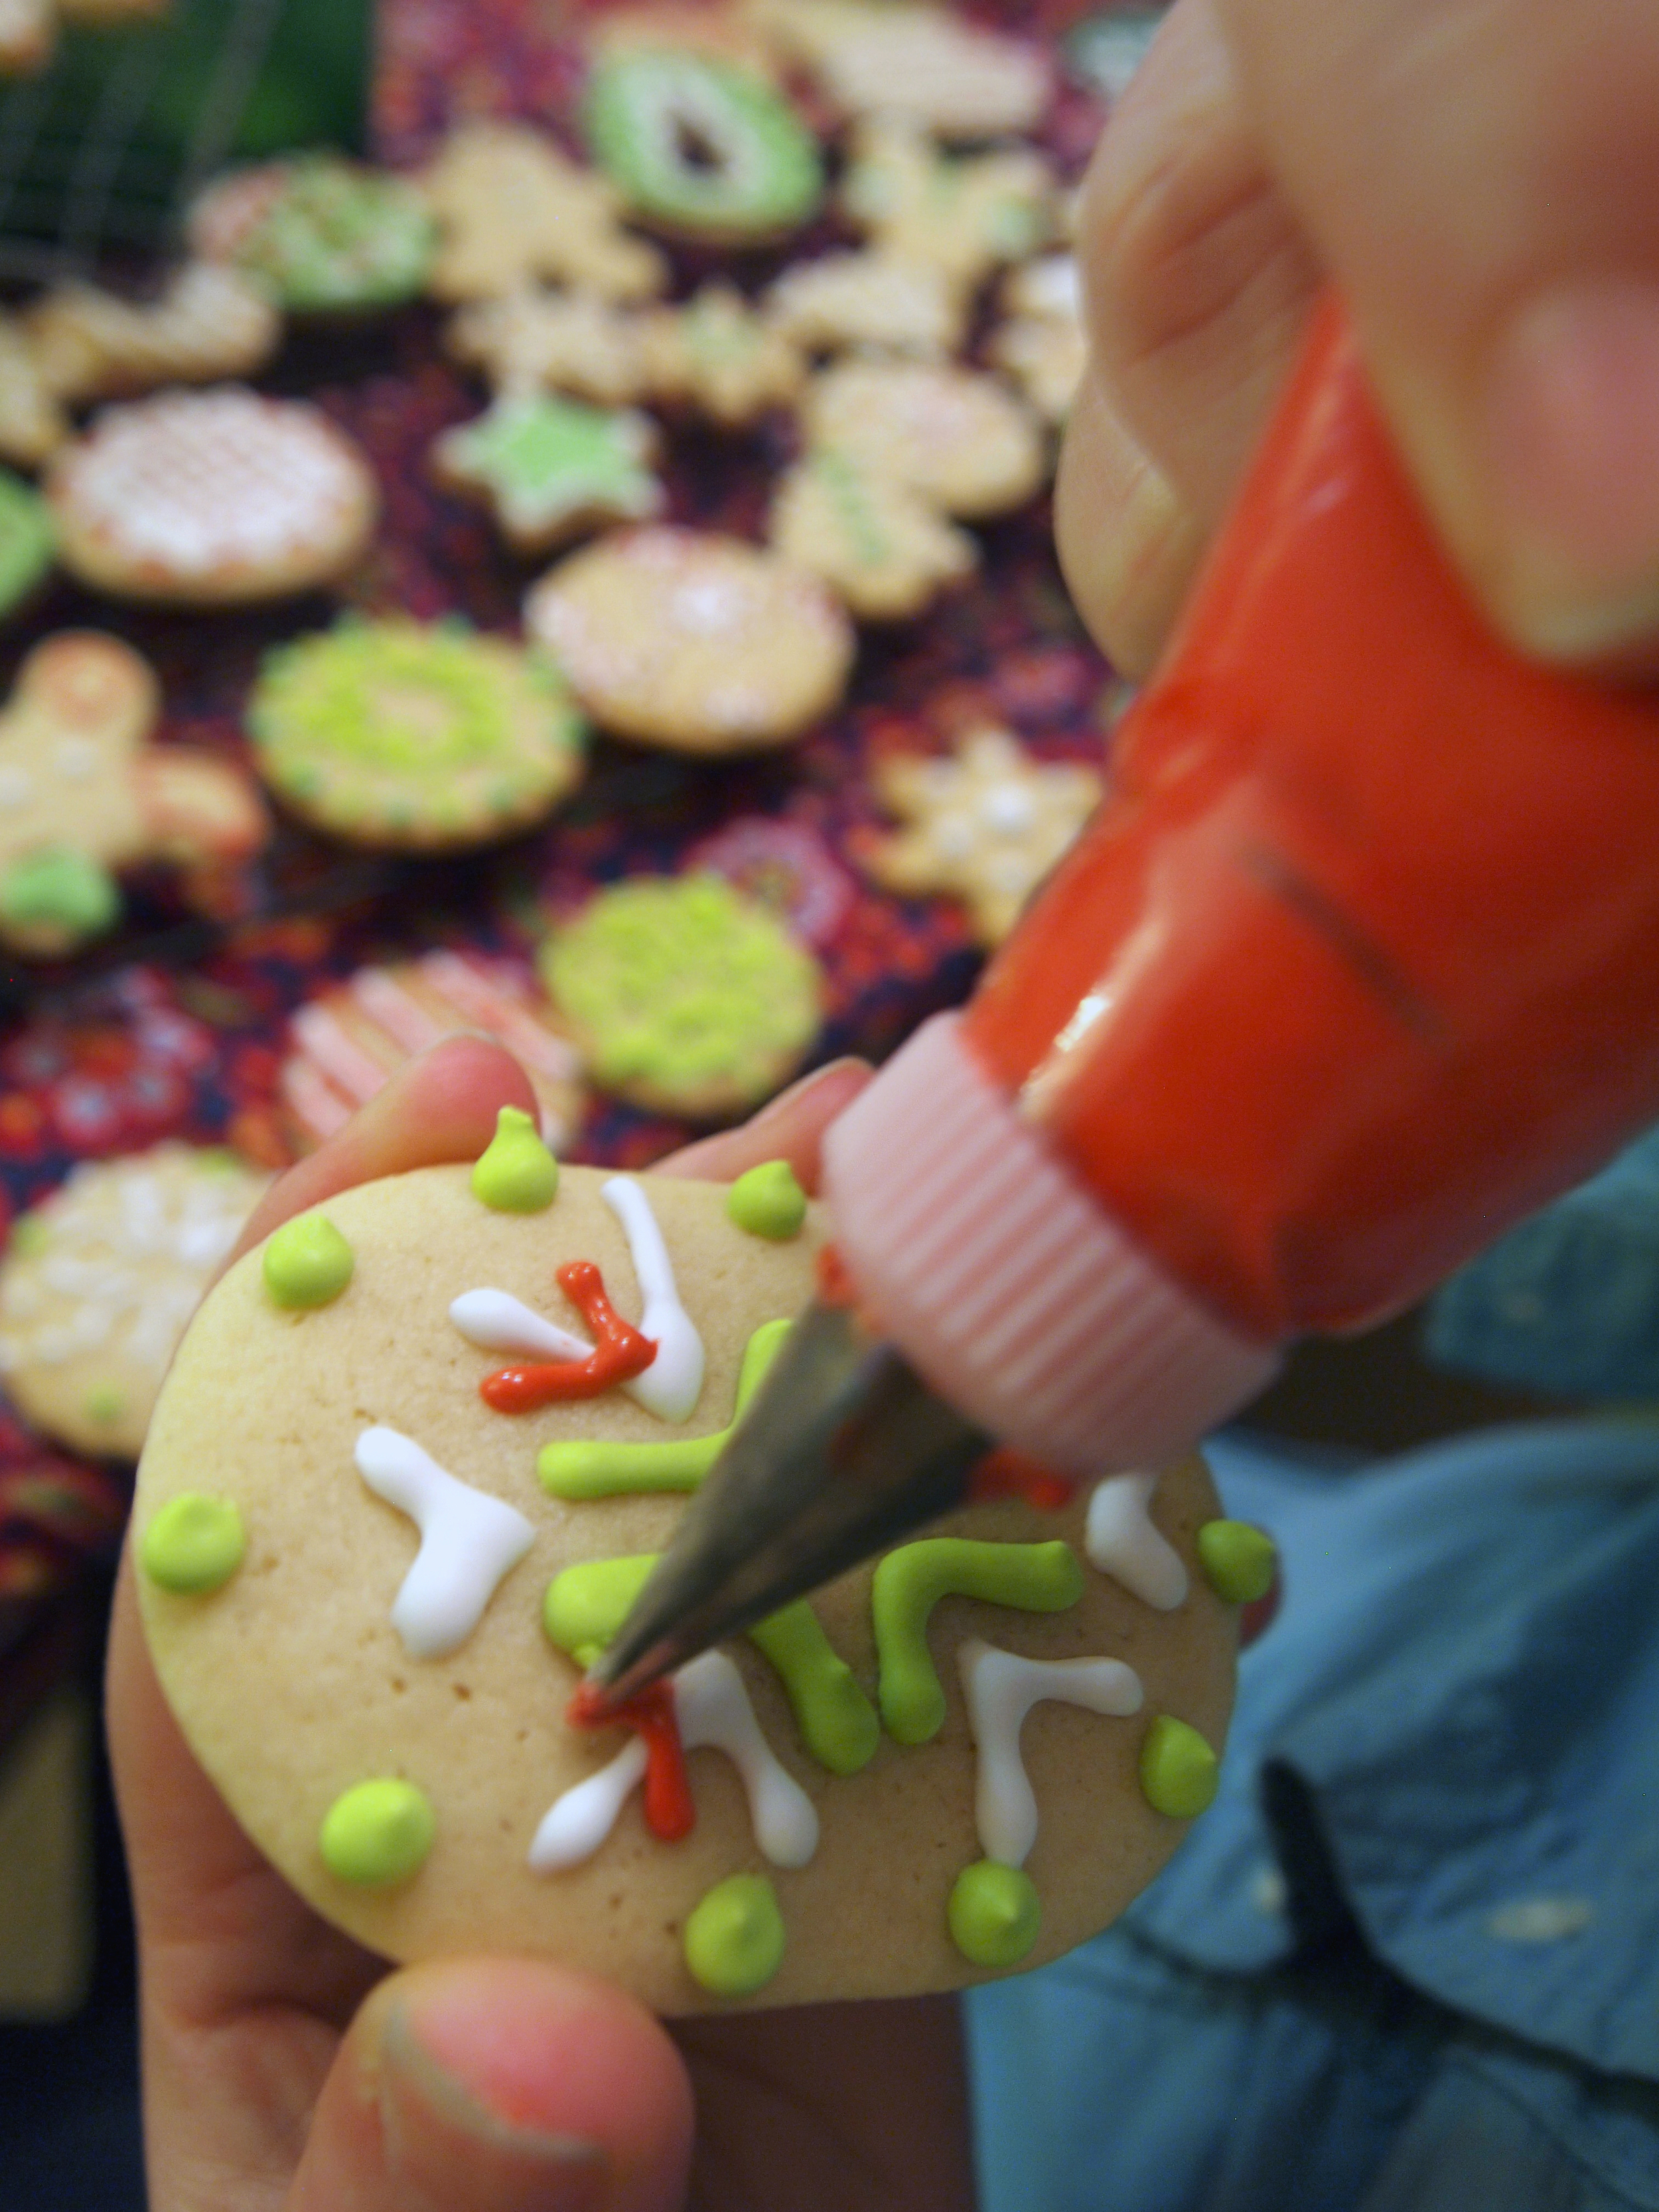
Some of my favorite elements that I rely on in cookie decorating:

Dots

Double Dots

Stripes

Hearts

Dashes

"V"s
Do you feel ready to conquer your own cookies? Please ask any questions you have and share pictures of your holiday cookies with us! Happy decorating!
To get you started, here are the links to the tools that we use: